

Automate OBS scenes and effects
Connect strAImer to OBS Studio on Windows and let channel point rewards, donations or your own buttons trigger scenes, sources, filters and audio. For example, a reward can turn on a filter for 30 seconds, then turn it off again.
Free — like everything that runs on your own PC.
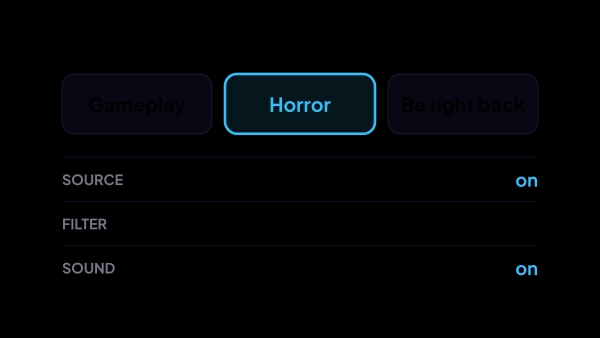
- source Webcam
- filter Glitch
- sound Microphone
What it can switch
More than scenes, which is the part people usually expect and stop at.
- Scenes — the whole layout at once.
- Sources — show and hide individual elements.
- Filters — turn an effect on or off on a source.
- Sound — mute an input, unmute it, set its volume.
What happens while you are playing
Switching is the visible half. The rest runs with nobody pressing anything, and it is what keeps the stream from drifting out of step with itself.
- An effect switched on for a set number of seconds takes itself back. You do not have to remember it mid-game, and a paid effect stays a moment instead of becoming a permanent change.
- Channel point rewards can follow the scene: a scenario group reads the state of OBS — this scene on air, that source visible — and lights up only the rewards that make sense right now. Rewards the app created, that is; Twitch does not let anyone edit the others.
- OBS is one of the signals behind the single live-or-not flag the whole app uses, so timers and the assistant know a stream is running even when no platform is connected by API.
- strAImer overlays inside OBS get their page cache refreshed on the first connection after the app starts. A browser source loaded weeks ago keeps sending a token the app no longer recognises, and the overlay quietly goes dead — that used to be a manual fix.
- Scene names and source names come back out of OBS, so what you pick in a scenario is a real name from your own layout, not one you typed from memory.
What it is not
Three things people reasonably expect here and will not find.
- It never switches anything by itself. Every change arrives as a command — from a scenario, from a panel button, from the AI assistant if you run one. That assistant is the paid part of the app, and nothing on this page needs it.
- Nothing in the interface starts or stops recording or the broadcast — no button, no scenario step — and that is on purpose. A scenario most often fires from a channel point reward, and any viewer could then end your broadcast for the price of a reward. Those controls arrive together with the rule for who is allowed to start which scenario.
- It is not a remote control over the internet. The address you type is your own machine, or another PC on the same local network — there is no phone app, and nothing passes through our server.
How the link is made
One connection over obs-websocket, set up once and then left alone.
- obs-websocket is built into OBS 28 and newer; in older versions it is a plugin.
- Address, port and password are entered once, and the password stays on your computer.
- A dropped connection reconnects by itself, waiting a little longer after each failure and never giving up — OBS gets restarted more often than anything else in the stack.
- Our server is not part of this link. If straimer.com is down, the scene still switches.
Where you see it working
A scene that did not switch should be explainable in under a minute, so the answer sits in three places instead of a log file somewhere.
- The module page shows the connection status and a log of every command sent to OBS.
- The same page can switch a scene and toggle a filter on demand, so the link is proven before a viewer tests it for you.
- On the Dashboard, the Scenarios: Running tile counts down what is running now and repeats an effect that jammed.
What it is made of
Each part is a separate module: you install only the ones you need, and any of them can be removed without breaking the rest.
Getting started
- In OBS turn on the WebSocket server — Tools → WebSocket Server Settings — and set a port and password.
- In the app open Connections → OBS and fill in the host (127.0.0.1 for the same machine), the port (4455) and that password.
- Wait for the status to turn to connected.
- Open Automation → Scenarios, pick what starts the chain and add the OBS steps to it.
- For an effect that should not stay on, add a delay and the step that switches it back.
OBS on a second computer works the same way: put that machine's address in the host field instead of 127.0.0.1, with both computers on one local network.
Works together with
Get strAImer
Everything on this page runs on your own computer — free, no account, nothing to connect.
Missing something here? Ask for it on the ideas board — votes show what people need most. Propose an idea